3D Art : Pinch Pot
- careandbear16
- Apr 27
- 3 min read
Updated: May 1

Theme: Nature
Step 1: Get your clay ready
- Work the clay in your hands to soften it and remove any air bubbles. Wedge and knead the Clay!
Step 2: Form a ball
- Roll the clay until it is smooth and shaped like a sphere.

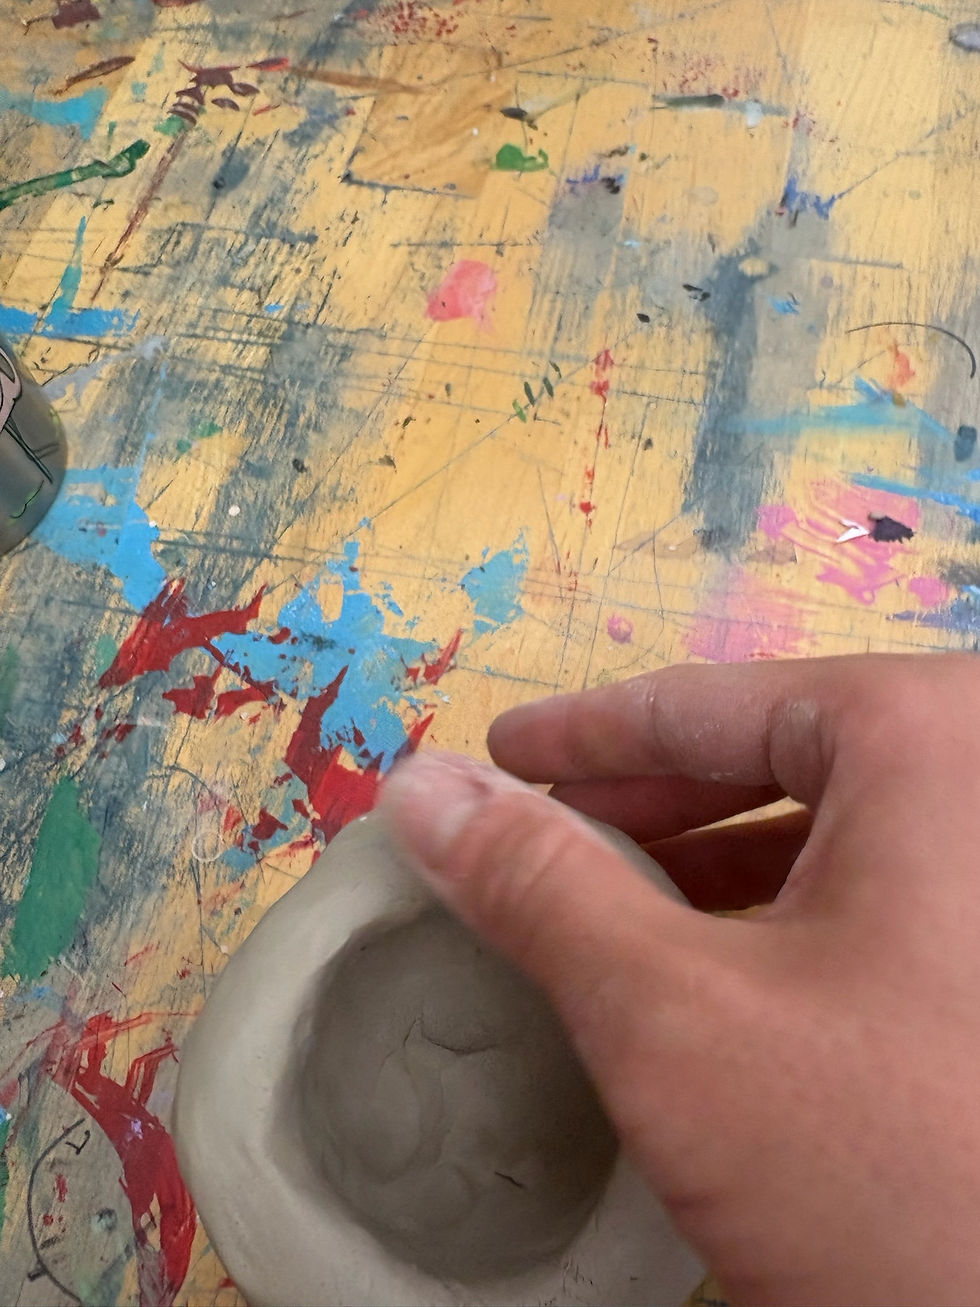
Step 3: Make an opening
- Press your thumb into the center, but don’t go all the way through.
-Gently move your thumb around inside to open up the space.

Step 5: Start pinching
- Use your thumb on the inside and fingers on the outside to pinch the clay.
Step 6: Turn as you work
- Rotate the clay slowly while continuing to pinch around the sides.

Step 7: Raise the walls
- Keep pinching to make the sides taller and thinner.

Step 8: Check thickness
Make sure the walls feel even all the way around. Adjust if needed.

Step 8 continued.
Step 9: Shape your pot
- Use your hands to gently form the outside into the shape you like.

Step 10:
- Smooth it out. Rub the surface with your fingers to remove cracks and bumps.
Step 11:
- Level the base. Tap the bottom lightly on the table so it can sit flat.

Step 12: Fix the top edge
-Smooth or pinch the rim so it looks clean and even.

You're almost there!

Step 13:
-Add texture or design. Press patterns, carve lines, or use tools to decorate your pot.
Step 14:
-Let it dry. Leave your pinch pot to dry completely before the next step (like firing or painting).
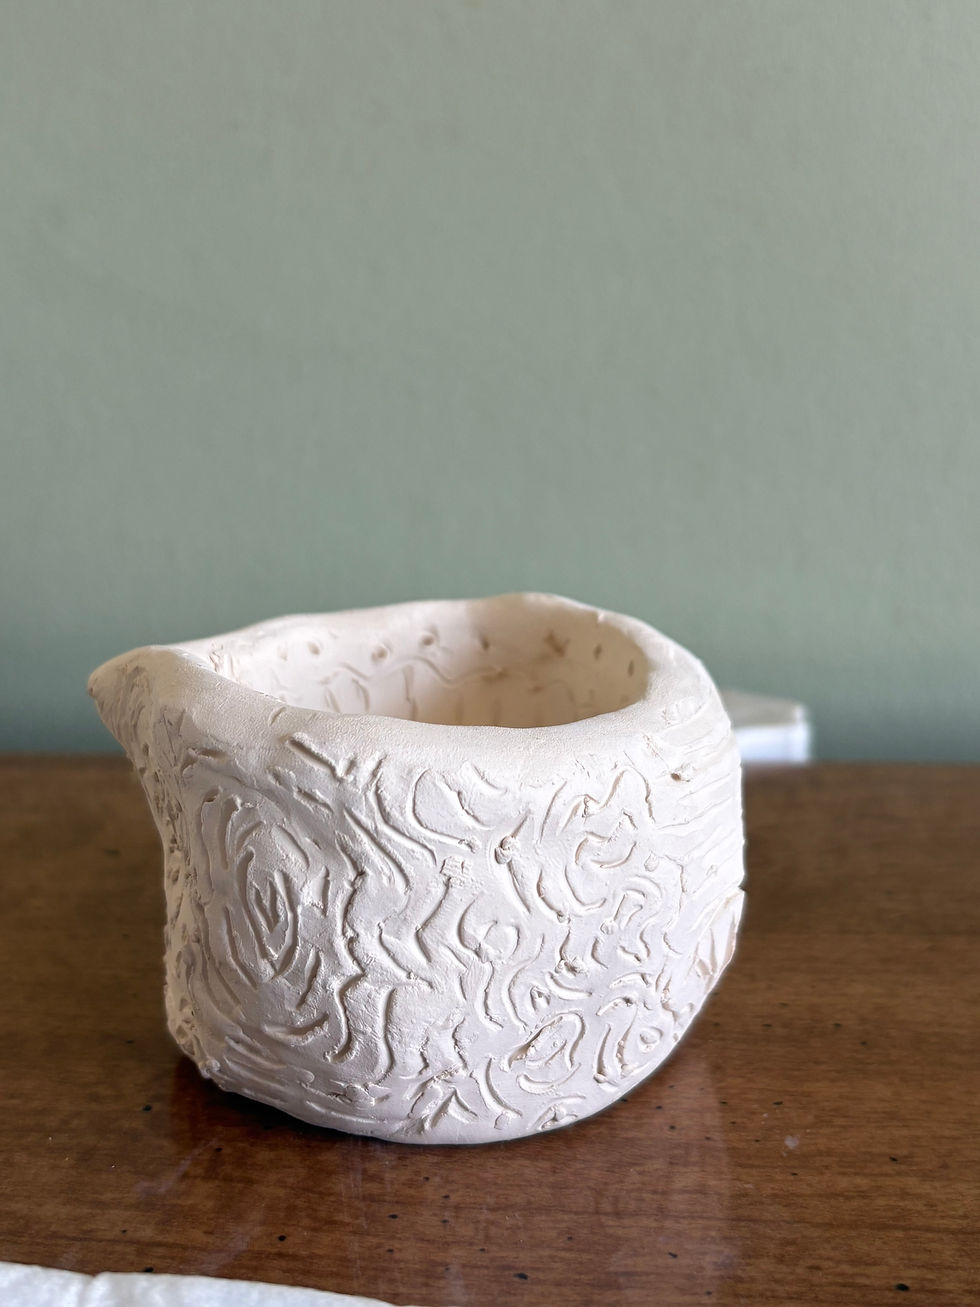
Final Product:


Next steps: Glaze and Fire!
Design: inspired by patterns in tree trunks

Pinch Pot Artist Examples:
This pinch pot was made using a basic hand-building technique in which clay is shaped by pressing and turning it with your fingers. Pinch pots are among the oldest types of pottery and have been made for thousands of years, dating back to early human history (The Pottery Wheel, 2024). Before tools such as the potter’s wheel existed, people used simple methods like pinching to create both useful and decorative objects (The Pottery Wheel, 2024). Because of this, the pinch pot is still an important starting point in ceramics and helps artists understand how to shape and control clay by hand.
A pinch pot may seem simple, but it teaches important skills when working with clay. It helped me understand how small movements can change the shape and how important it is to keep the walls even so the piece does not crack or break. I had to work slowly and pay attention to the clay so it would not dry out while I was shaping it. Even though it starts as a basic form, a pinch pot can be changed with texture, shape, and added details, which makes it a strong starting point for more creative work
Reflection:
The process involved a lot of trial and error. I had to correct uneven areas and reshape parts as I went.
If I were to do this again, I would spend more time making sure the walls are even and take more time to smooth them out. This would help the pot look more balanced and refined.
I am most pleased with the design and texture of the pot, especially after it was fired. The texture adds visual interest, and the final piece feels more complete and strong.


Comments